A Paint Test Strip Shows How a New Paint Will Behave
A paint test strip reveals coverage, layering and drying behaviour before you commit a larger surface, so you can choose a suitable method with confidence.
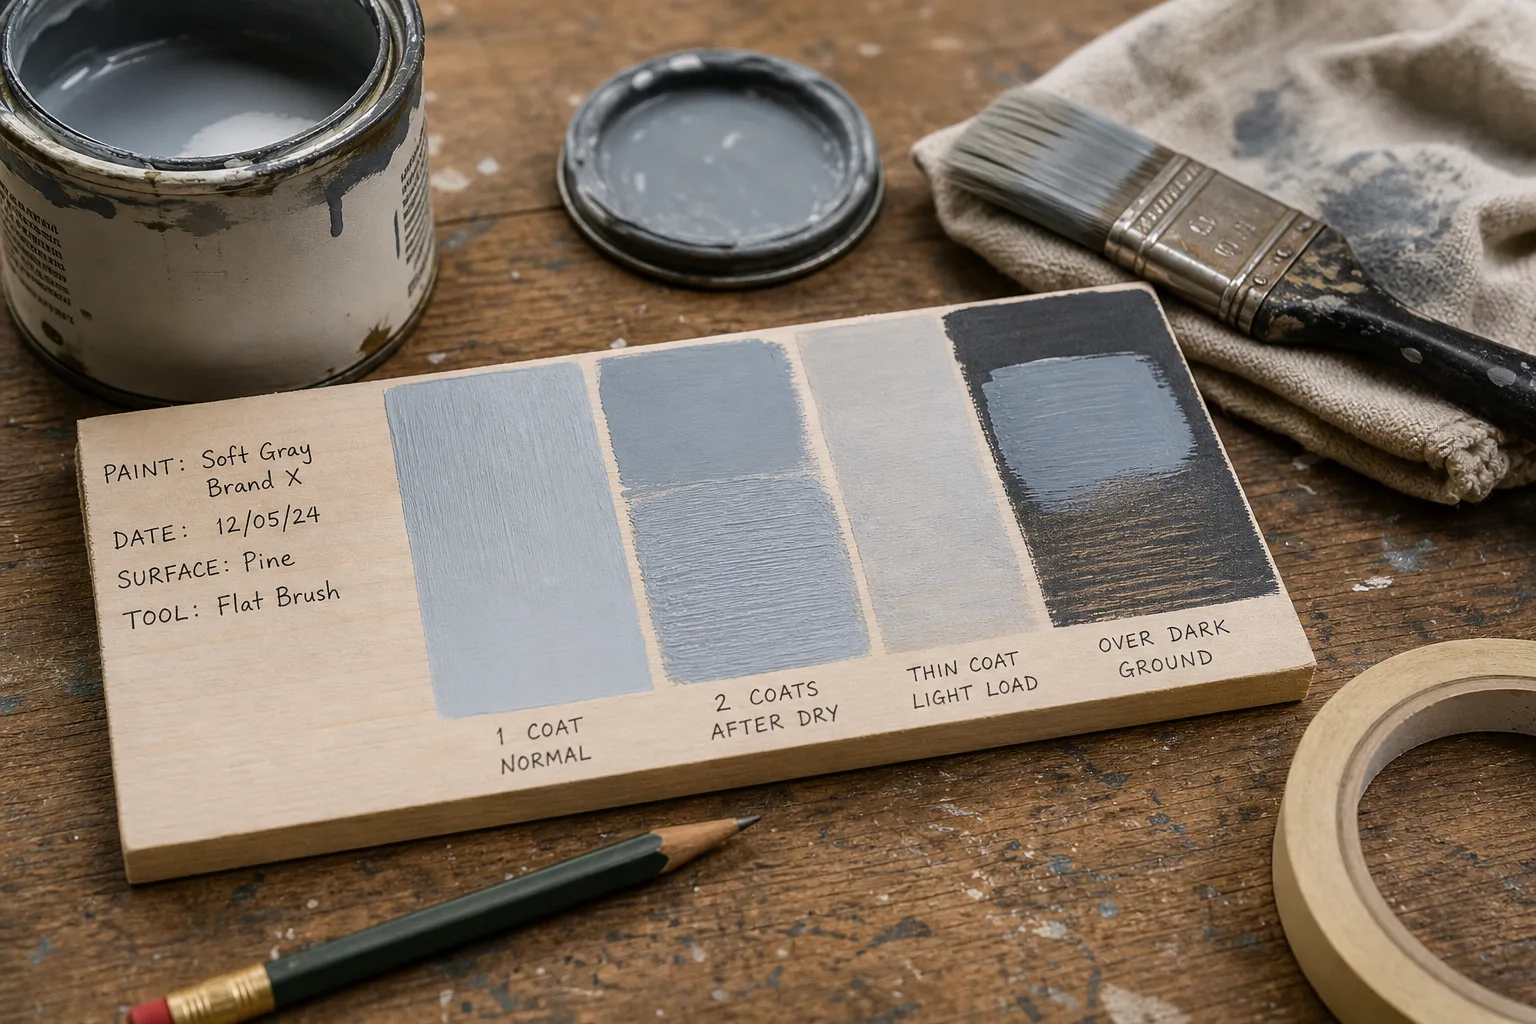
A paint test strip tells you how a new paint behaves before it reaches the whole project. On a small, labelled piece of the same material, you can check coverage, layering and drying without turning the finished object into an experiment.
Keep the strip simple enough to read at a glance, but varied enough to answer real questions. The point is not to make a miniature masterpiece; it is to notice what the paint does under conditions you can repeat.
1. Choose a test surface that matches the project
Use a scrap of the material you intend to paint: the same paper, card, wood, primed surface or other suitable base. Paint can soak into one surface, sit on another or catch on texture, so a strip on unrelated material may give a misleading impression.
If the project uses a primer, sealant or existing colour, reproduce that layer too. Let any preparatory coat dry as directed on its container before painting the strip. This keeps the test close to the actual sequence rather than asking one surface to answer for another.
Cut a piece large enough to hold several small areas and leave a margin for a label. A scrap from the project material is useful, but not if removing it leaves the project short. Set aside a separate offcut before you begin, or use a matching spare.
- Match the material and its surface texture.
- Reproduce any primer or undercoat.
- Keep the back or edge available for written notes.
Match the surface first; a neat test on the wrong material is still the wrong test.
2. Label the strip before opening the paint
Write the paint name, colour, date and surface on the back or on a separate paper tag. Add the tool you plan to use, such as a flat brush, round brush or small roller. If you are comparing more than one paint or tool, give every option a clear code and put the same code beside its test area.
Use a pencil or permanent marker on the reverse, where it will not bleed through or mix with wet paint. If the strip has a front and back, mark the top edge as well; turning it round later can make a layered area look like a different test.
Leave room for observations rather than trying to fit a full report onto the strip. A short note such as “second coat after dry” is more useful than an unexplained symbol. Keep the tin or tube nearby while labelling so the product name and any preparation instructions are recorded accurately.
3. Divide the strip into useful test areas
Plan several small zones before painting. A strip can compare a thin pass with a fuller pass, a single coat with a second coat, and paint over a light or dark ground. Draw boundaries lightly on the reverse, or use masking tape to separate sections if the front needs clean divisions.
Do not change several things at once. If one area uses a different tool, also changing the number of coats makes it harder to tell what caused the difference. Keep the paint, surface and drying conditions consistent, then vary one factor per comparison.
A simple layout might include:
- A single, ordinary coat applied as you expect to work.
- A second coat, added only after the first is dry to the touch and ready for overpainting according to the product directions.
- A thinner or more lightly loaded pass, if that is a method you may use.
- A small area over a contrasting ground, if the project includes one.
Make the sections large enough for a brush to move naturally. Tiny daubs can hide drag, streaking and uneven edges—the very things the strip is meant to reveal.
4. Apply paint as you would on the finished piece
Stir or shake the paint as its label directs, and use the planned tool. Apply it with the same kind of movement you expect to use on the larger surface. If you normally paint a board in long strokes, do not test the paint with a few careful dots and assume the result will transfer.
Keep the brush load reasonably consistent between areas. A brush dripping with paint in one section and almost dry in another confuses the comparison. Clean the tool between different products, and note any dilution or other adjustment rather than relying on memory.
Say you are painting a pale wooden box with a new water-based craft paint. Imagine that you label a matching wood offcut, apply one normal coat to one half and a second coat to the other after the first has dried as directed. The expected observable result is a direct comparison: you can see whether the grain or old colour remains visible, and whether the extra coat improves coverage without producing an unwanted ridge or drag.
5. Check coverage under useful light
Look at the strip once the wet sheen has settled, then again after the paint has dried. Wet paint can look darker, glossier or more opaque than it will later. View it in the light in which the finished object will usually be seen, and turn the strip slightly to catch streaks or thin patches.
Coverage is not merely whether the base colour disappears. Look for gaps at edges, brush marks, visible texture, uneven colour and areas where the underlying material still shows. On a textured surface, check both the raised parts and the hollows.
If the first coat leaves the base visible, that may be acceptable for a transparent or intentionally washed effect. If you want an even, solid colour, record that a further coat may be needed. Do not add paint simply to make every section opaque; the right result depends on the intended finish.
6. Observe how coats meet and build
Layering reveals more than a colour change. Notice whether a new coat spreads smoothly over the dry one, catches on brush marks, lifts the earlier layer or leaves a visible boundary where one pass meets another. These behaviours affect how forgiving the paint will be on a large surface.
Follow the product directions for recoating. If the label gives a drying or overpainting instruction, use it rather than guessing from a surface that merely feels dry. Paint may feel dry at the top while remaining vulnerable beneath, and a rushed second coat can disturb the first.
Compare a second coat applied after the recommended interval with the single-coat area. Look for a more even colour, added thickness, trapped ridges or a change in sheen. If you intend to sand between coats or use a separate finish, test that sequence on another clearly labelled section rather than mixing it into the first comparison.
7. Give drying behaviour time to show
Drying is not one single event. The surface may stop feeling tacky before it is ready for handling, masking or another coat. Use the label’s guidance for those different stages, and avoid treating a quick touch as a complete drying assessment.
Keep the strip in conditions similar to the project: a comparable room, airflow and orientation. A strip beside a heater may dry differently from an object left on a cool worktable. Do not use heat or extra airflow unless the product instructions allow it; speeding the surface along can make the result harder to compare.
Check the strip at sensible intervals without repeatedly pressing the paint. Record whether it remains tacky, marks under gentle contact, or feels ready for the next planned operation. If the finish changes as it dries—perhaps becoming flatter or showing brush marks more clearly—note that too.
8. Read the result and adjust the method
Compare each area against the question it was designed to answer. If one coat gives the desired coverage, another may add needless thickness. If a second coat improves opacity but leaves ridges, adjust the amount of paint or brush movement and make a fresh small test before changing the full project.
Separate observations from decisions. “Base colour visible at edge” describes what you saw; “use a fuller first coat” is a proposed response. That distinction makes it easier to revise the method if another section of the project has a different texture or colour.
When results are unclear, change one condition and repeat only the relevant comparison. A strip is useful precisely because it makes a small correction affordable. It is not a verdict on the paint for every surface, tool and room.
9. Keep the label and the strip together
Once the paint has dried enough to handle, keep the strip with its notes or attach a paper tag. Record the coat sequence, tool, any dilution, the conditions that matter and the finish you preferred. Store it away from dust and direct contact with other painted surfaces, which may stick together if the paint has not fully cured.
A retained strip can help if you need to match a later repair or repeat the same method. Keep the product container’s instructions as the authority for preparation, handling and drying; the strip records what happened on this particular material in your chosen conditions.
Which paint test strip questions matter most?
How big should a paint test strip be?
Make it large enough for several brush strokes and clear comparison areas, with a margin for the label. A strip that is too small can hide streaks and make the paint behave unlike it will on the project.
Can I test paint on paper instead of the project material?
Use paper only if paper is the intended surface or if the test is limited to colour appearance. Absorbency and texture change how paint covers and dries, so use a matching offcut for a reliable process comparison.
How long should I wait before adding a second coat?
Follow the product label’s recoat guidance and consider the room conditions. “Dry to the touch” may not mean the paint is ready for another layer or for handling.
Should I test the final varnish on the same strip?
If the project will be varnished, test the full finish sequence on a separate labelled area or matching strip. A clear coat can alter sheen, colour appearance or surface feel, so the unvarnished paint alone cannot answer that question.
A well-labelled paint test strip turns a vague guess into a visible comparison. Keep the surface, sequence and conditions close to the project, and let the result guide the method before the larger surface gets involved.