Keep a Project Log That Helps on the Next Attempt
A project log turns notes on materials, decisions and snags into a clear plan for repeating a craft or repair without relying on memory.
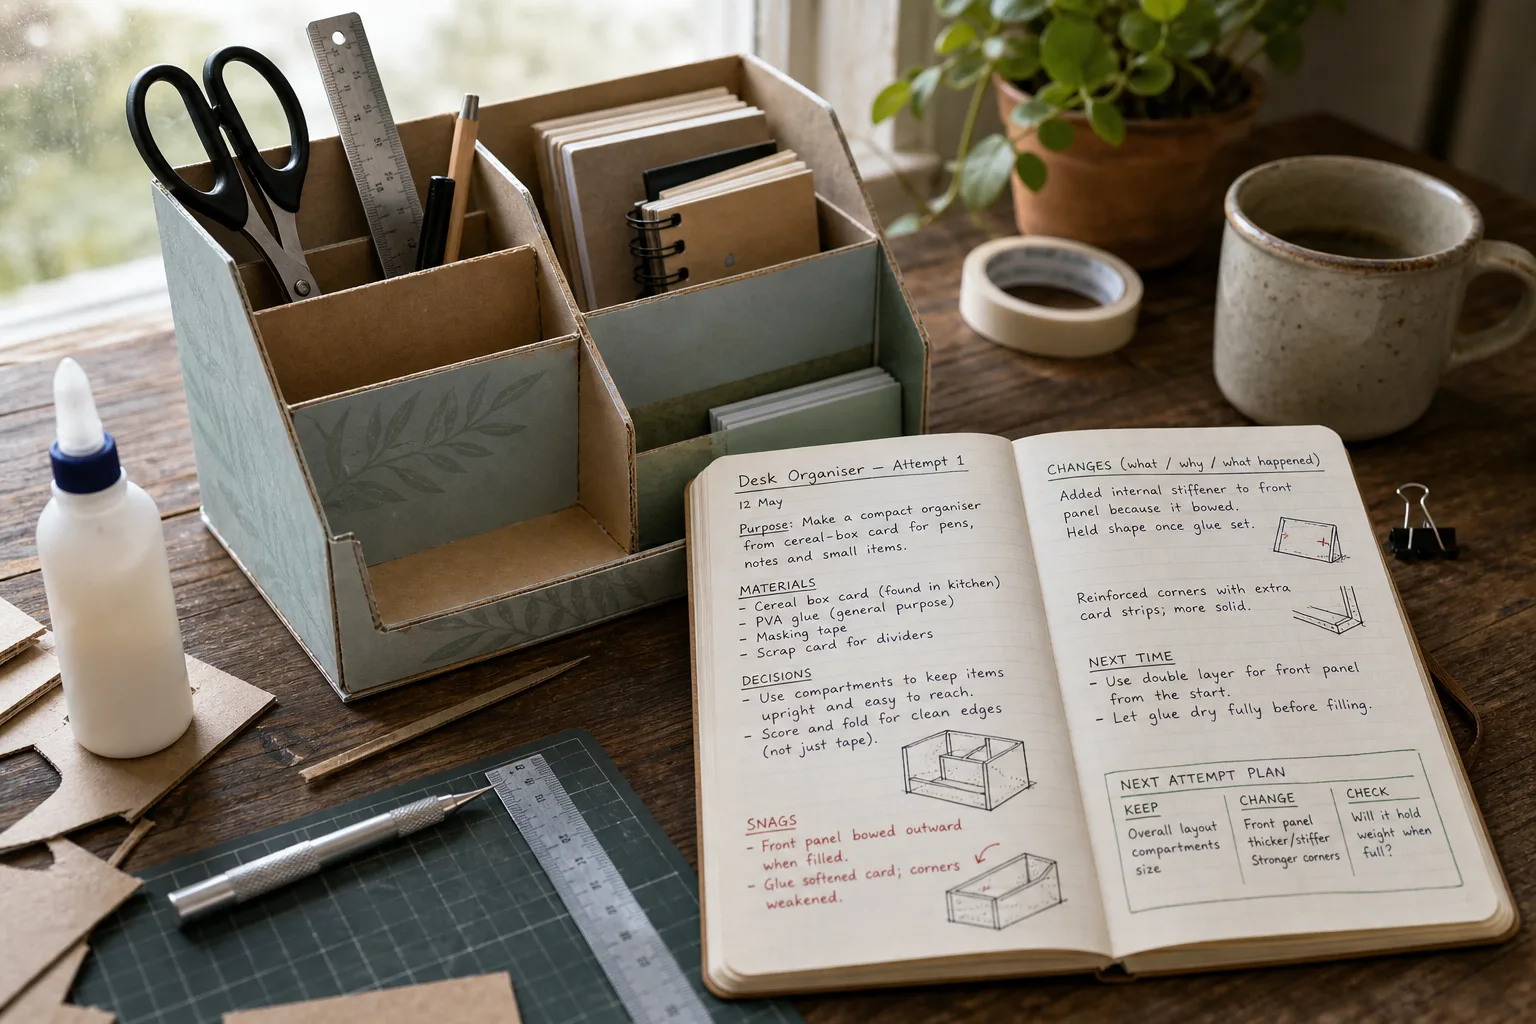
A project log makes a repeat attempt easier when it records what changed the work, not every move your hands made. For a paper lantern, a repaired drawer or a small model, a compact account of materials, decisions and snags can spare you from repeating an avoidable detour. The useful question is not “What did I do?” but “What will I need to know next time?”
Set up the project log before you begin
Choose a notebook, a folded sheet kept with the project, or a notes app you can find again. A phone note is handy for a quick record; a notebook lets you sketch a joint or mark where a piece of card split. Pick one place and stick with it. Scattered notes are less a log than a small archaeological problem.
Give the entry a plain title and date, then leave room for four things: materials, decisions, snags and changes. Add the project’s purpose in one sentence. “Make a shallow tray that fits the desk drawer” is more useful than “tray project”, particularly when several months have passed and the desk has acquired new contents.
- Materials: name the type, source or useful identifying detail, such as thin birch plywood or a particular brand of PVA glue. Record what you actually used, not what you meant to use.
- Decisions: note the choice and its reason, such as using a paper template because the drawer corners are not square.
- Snags: describe what happened and where, without turning the entry into a verdict. “Back edge lifted while glue dried” gives the next attempt something to address.
- Changes: record any departure from the original plan and what you noticed afterwards.
- Next time: write the first useful adjustment while it is still obvious.
Keep the headings short. The log should be quick enough to use with glue on your fingers, or at least before you touch the phone.
Use a week-long routine that follows the work
A project may take one afternoon or several days of waiting. A simple weekly rhythm keeps the notes close to the decisions, without requiring a diary entry every time you pick up a tool.
Before the first session, record the starting point
Write down the goal, the materials on hand and any constraints that could affect the result. Include a quick sketch or photograph if shape and placement matter. Note what you do not yet know: perhaps the lid must fit over a rim, but the available card has not been checked for stiffness.
Separate a plan from a fact. “Try a wider base” is a proposal; “the base rocked on the table” is an observation. Keeping the two distinct stops a guess from quietly becoming the official history.
During each session, capture decisions and snags
Record only details that could affect a repeat attempt. If you switch from scissors to a craft knife because the edge is ragged, note the tool change and the result you can see. If you adjust a clamp or move a seam, record where and why. A rough sketch with an arrow can carry more useful information than a paragraph describing the same corner.
For a change, use a small three-part note: what changed, why it changed, and what happened next. “Added a folded tab because the side bowed; the panel held its shape while the adhesive set” gives a clearer lead than “made it stronger”.
At the end of each session, leave a restart note
Write the next action in plain language: “Trim the top edge after the glue has set” or “Check that the screw reaches the solid frame, not just the thin back panel.” Add any waiting condition that matters, such as letting paint dry or keeping pieces clamped. This is especially useful when the project has to pause for work, family or a missing component.
Put the tools away only after you have made the restart note. Memory is a poor storage system and has no reliable filing cabinet.
At the end of the week, extract the next-attempt plan
Read the notes once the work is finished, or once the week’s session is over. Mark the observations that would change how you begin again. Leave routine details alone unless they explain a result. A useful log is selective: it preserves the reason for a decision, not the entire choreography of making.
Finish with a short “next attempt” block: keep, change, check. This gives the next version a starting point without pretending you already know how every adjustment will turn out.
Record useful detail without writing a diary
Useful detail is specific enough to act on, but small enough to find. “The glue was too wet” is hard to use later unless you know what you saw. “The panel slid when I removed the clamp, so I held it in place until the surface stopped feeling slick” describes a snag and the response. If you do not know the cause, say so. “Edge lifted; cause unclear” is more honest and more useful than a confident theory.
Record materials by the features that mattered to the work. For paper, that might be weight, finish or whether a fold cracked. For timber, note species if known, thickness as labelled or measured, and whether the piece was warped. For a fastener, identify its type and where it went. Do not add measurements for their own sake; include them when they would help you cut, fit or place something again.
Use photographs as evidence of layout or sequence, not as a substitute for notes. A photograph of a small hinge may not reveal which side faced the cabinet. Add a brief caption or arrow. If you sketch, label the part and mark its orientation.
What should a project log answer?
What materials should I record?
Record the materials that affected the outcome, including useful labels, sources, substitutions and visible properties. If a detail would not alter your next choice, it can usually stay out.
How do I write down a failed attempt?
Describe what you observed, where it happened and what you did afterwards. Avoid calling the whole attempt a failure; one loose corner may be a specific problem with a specific remedy.
Should I use paper or a digital project log?
Use paper for quick sketches and notes kept beside the work; use a digital log if you want to search entries or attach several photographs. Either is suitable if it is easy to reach and does not split the record across several places.
How long should a project log entry be?
Long enough to explain the choices that matter, short enough to finish before you lose the thread. A few labelled notes and one small sketch often beat a detailed account of every routine action.
Turn one completed attempt into a better next start
Say you are making a desk organiser from cereal-box card and the first version sags when filled with pens. You note that the base stayed flat, the long sides bowed, and a folded internal divider seemed to stiffen the middle. You do not claim the divider solved the problem everywhere; you record what you saw and plan to try a fuller support in the next version. When you return, the log points you towards the sides rather than sending you back to redesign the base.
Keep the final plan modest. List what to repeat, what to alter and what to check before committing material. If the cause of a snag remains uncertain, make the next attempt a small, controlled change rather than rewriting the whole design. A project log earns its space when it makes the next decision easier, even if the project itself remains gloriously imperfect.