A Paper Mock-Up Before the Cardboard Cut
A paper mock-up checks proportions and joins before cardboard is cut, helping you choose a model-making method that exposes the right problems.
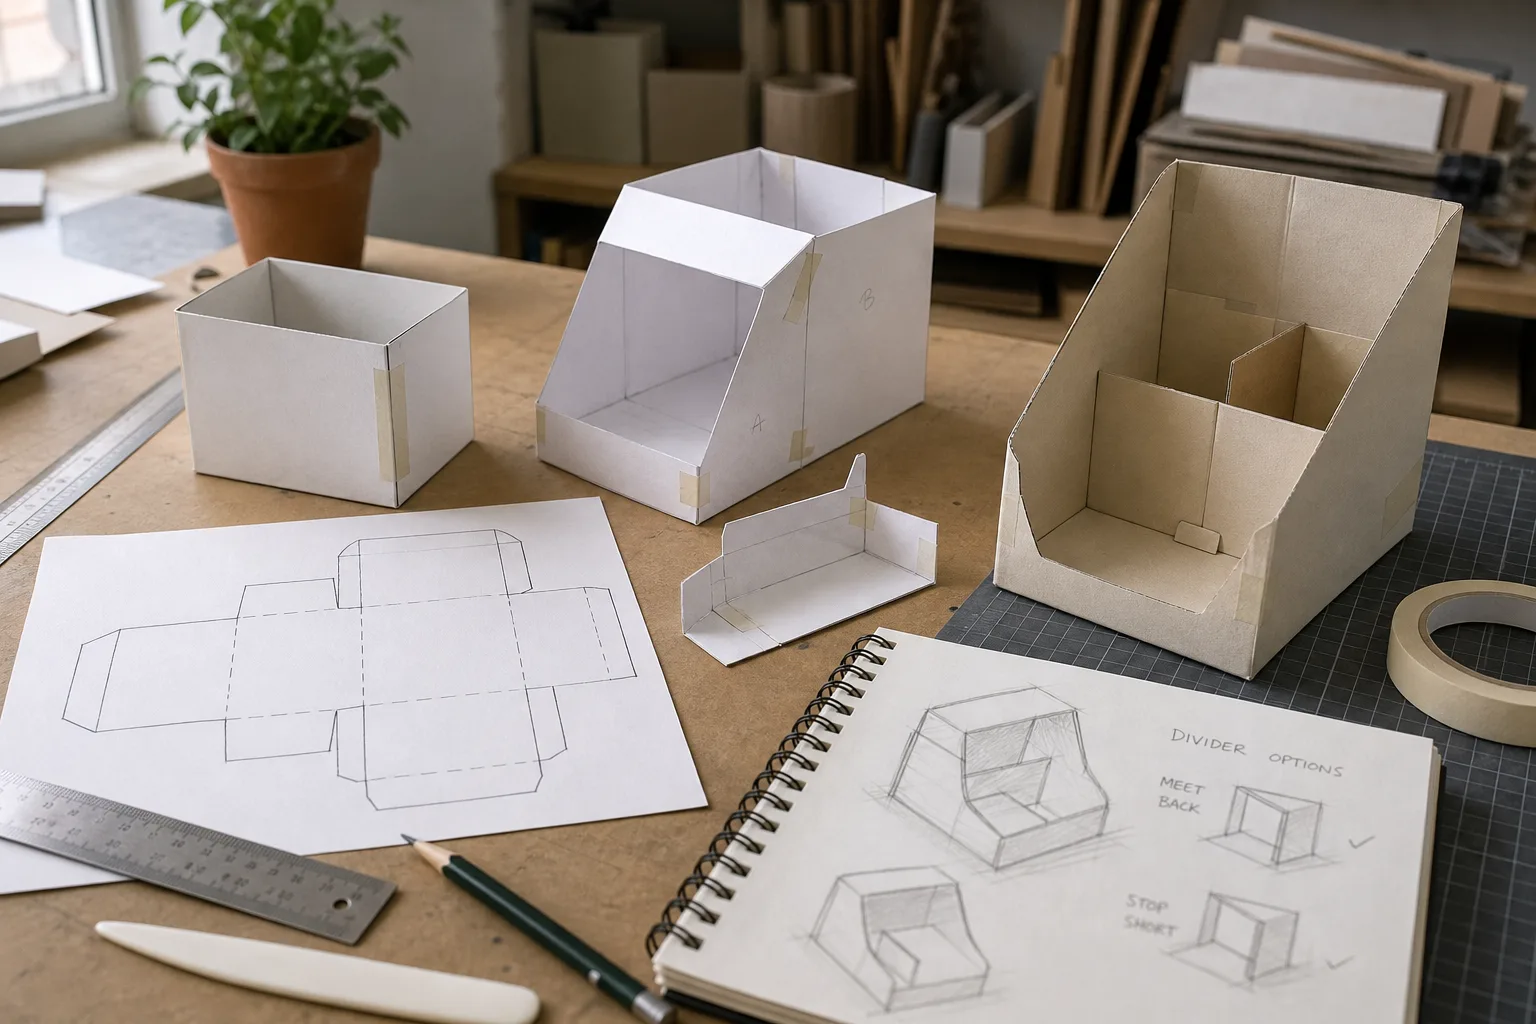
A paper mock-up catches awkward proportions and weak joins before you cut cardboard. For a small box, stand, display shell or other built object, a few folds in ordinary paper can show whether the shape works and how its parts meet. The useful question is not which model looks most finished. It is which one answers the question you need answered.
There are three practical options: a flat paper pattern, a loose three-dimensional paper model, and a reinforced mock-up made from heavier paper or thin card. They demand different amounts of cutting and assembly, and reveal different problems. Choose by the uncertainty you need to reduce, not by how satisfying the model looks on the workbench.
A flat pattern is best for checking dimensions and folds
A flat pattern is a drawing or cut-out that shows the faces of an object laid out in one plane. It is sometimes called a net. For a simple carton, the net includes the main panels and any flaps that fold to form the sides or close the top. You can draw it on scrap paper, cut it out and fold along the planned lines.
This approach suits projects where the main uncertainty is size: whether an object will fit inside, whether two faces are in proportion, or whether the proposed folds can form the intended shape. It is quick to alter. If a wall seems too narrow, redraw or trim the corresponding panel rather than rebuilding the entire model.
Use paper that folds cleanly and mark each fold before cutting. A ruler and a blunt scoring tool, such as the back of a table knife, can make a crease easier to control. Score lightly; a sharp edge or heavy pressure can cut through the sheet, which is an efficient way to make a model less useful.
A flat pattern is less informative about how an object feels assembled. Its panels may appear to fit on the page but collide when folded, or a flap may have nowhere to go once another face is in place. It also cannot tell you much about stiffness. A paper wall that stays upright may sag when made from a different material, while a floppy sheet can still be useful for checking the layout.
Choose a flat pattern when the design is simple, dimensions dominate, and the joins follow clear fold lines. If you need to judge the assembled form or the order of assembly, make a three-dimensional model instead.
A folded three-dimensional model reveals shape and assembly order
A loose three-dimensional model is made from paper, then folded and held together with tape, small tabs or temporary clips. Unlike a net, it shows the object in the form you intend to build. It helps you inspect proportions from different angles, see whether faces meet, and discover whether a hand can reach a joint during assembly.
This option suits objects with several faces, angled panels, openings or overlapping parts. A paper sleeve around a container, for example, can expose whether its opening is placed sensibly and whether its panels wrap without buckling. For a small freestanding display, a model can show whether the base appears too narrow for the upper section, though it cannot establish how well the final material will support that load.
Keep the first version deliberately loose. Use masking tape or small pieces of low-tack tape on the outside of a seam, where you can remove them without tearing an important panel. A few removable tabs are often more useful than a carefully glued edge: they let you separate a joint, adjust a face and put it back together without pretending that an early draft is precious.
Label the faces and mark which edges meet. If the model comes apart, these marks prevent the familiar game of holding two nearly identical panels together and asking which one was meant to face out. Use a pencil for changes, and note where the shape pinches, overlaps or leaves a gap. Those marks are design information, not evidence of failure.
A loose paper model is not a strength test. Paper bends, tears and holds tape differently from cardboard. Treat it as a way to check shape, access and assembly sequence, then consider the final material separately. For a large or load-bearing object, paper is especially poor at answering whether the structure is safe; seek suitable technical guidance rather than relying on a convincing-looking mock-up.
A reinforced mock-up helps when seams and handling matter
When a design needs more body than a sheet of printer paper, use heavier paper, thin card or paper backed with removable tape. This middle option is more stable in the hand and can make seams easier to inspect. It is useful when you need to compare panel stiffness, see how a tab sits against a face, or hold a shape while checking the order of assembly.
Use the same basic construction method you expect to use later, but keep the joins reversible where possible. Tabs, paper clips and small pieces of masking tape can stand in for permanent glue. If the final object will use slot-and-tab joints, cut those into the mock-up too. A decorative strip of tape across a seam may hold the model together, but it says little about whether the intended tab is long enough or positioned correctly.
Reinforcement has a cost: the model is slower to change. A taped seam can stiffen the sheet, hide a gap or prevent the panel from moving naturally. If you want to inspect a joint, avoid covering it. Use a temporary fastener at one end, or make the connection with a tab that can be withdrawn.
Say you are making a small desk organiser from corrugated cardboard and are unsure whether its divider should meet the back wall or stop short. Cut the outer shell from scrap paper, mark the divider position, and attach a paper divider with a removable tab. The visible result should be clear: you can see whether the divider blocks the opening, whether its edge meets the back where intended, and whether the planned assembly sequence leaves room to insert it. The model will not tell you how much weight the cardboard can bear, so keep that question for a separate material and construction decision.
Choose the reinforced option when the design is mostly settled and you need to inspect the behaviour of joins or parts in the hand. If dimensions are still changing freely, return to a simpler pattern rather than spending time strengthening a shape that may soon be redrawn.
Choose the model that answers your main question
Before cutting, write down the uncertainty in one plain sentence. “Will the opening fit around the object?” points towards a flat pattern or paper sleeve. “Can I assemble the sides in this order?” calls for a loose three-dimensional model. “Does this tab stay in place while I handle the piece?” suggests a reinforced mock-up.
- Use a flat pattern when the object has a simple layout and you mainly need to check panel sizes, fold positions or fit.
- Use a loose paper model when you need to inspect the assembled shape, access to joints, or the order in which parts meet.
- Use a reinforced mock-up when the shape is nearly settled and you need to examine tabs, seams or handling.
These options can also follow one another. A flat pattern can settle the layout; a folded model can reveal a collision; a small reinforced section can clarify a troublesome joint. Do not make all three by default. Move to the next one only when the current model leaves a specific question unanswered.
For a project with many similar panels, mock up one representative corner or joint rather than the whole object. This can answer whether a tab folds in the intended direction without consuming time on surfaces that have already been resolved. Mark where the sample belongs in the design, so its lesson does not get detached from the part it represents.
What does a paper mock-up check before cardboard cutting?
Can paper confirm the final size?
It can help check dimensions and fit if you draw or cut the model to the intended size. It does not predict how the finished material will bend, compress or spring back.
Should the mock-up use the same thickness as the cardboard?
Not necessarily. Thin paper is easier to alter and suits proportion checks, while heavier stock can give a more useful impression of how a joint sits. Neither behaves exactly like every kind of cardboard.
How should temporary joins be attached?
Use removable tape, small tabs or clips where they leave the joint visible and let you take the model apart. Avoid covering a seam if the seam itself is what you need to inspect.
When is a paper model not enough?
It is not enough when the central question is strength, load capacity, fire safety or another property of the final material. Make a suitable prototype or consult a qualified professional where failure could cause harm.
Turn the paper model into a useful cutting decision
A mock-up earns its place when it changes what you do next. After folding it, name the visible issue: a face overlaps, a tab has no room, the opening is misplaced, or the build order is awkward. Then revise the drawing or joint and check that particular point again. If the model looks plausible but has not answered your original question, it is decoration with tape.
Keep the approved pattern separate from the altered drafts. Mark the faces, fold lines, slots and tabs clearly, and note which side of the material will face out if that affects the build. For cardboard, transfer the final layout only after checking that the planned cuts leave enough material around slots and edges for the intended joint. The appropriate allowance depends on the material and design, so use the mock-up to expose the layout rather than to invent a universal rule.
For a quick paper mock-up before cardboard cutting, start with the least elaborate method that can show the problem. A flat pattern settles dimensions; a loose model checks shape and assembly; a reinforced section examines a stubborn joint. Make the model smaller in scope if the question is narrow, and larger only when the whole form needs inspection. Then cut the cardboard with a drawing that has earned its way off the page.